How To Create And Export Print Layouts In Python For Qgis 3
I’ve been struggling off and on for literally months trying to create and export a print layout using Python for QGIS 3. Or PyQGIS 3 for short. I have finally figured out may of the ins and outs of the process and hopefully this will serve as a guide to save someone else a lot of effort and time.
To begin I’ll point you to this link which has the full code, top to bottom. This is an evolving document so I can’t say this file will stay exactly the same but you’ll find all the elements of this blog post in the code. Check it out here: https://github.com/epurpur/PyQGIS-Scripts/blob/master/CreateLayoutManagerAndExport.py
I greatly underestimated this process. But hopefully this example will make your life easier Due to the near unlimited customization one print layout can have, there are a lot of small details I’ll go into and show examples for. You can mix and match for your needs. I’m also going to dive into the documentation to show you how I referenced various class methods, attributes, etc.
I’ll start by initializing a new print layout.
project = QgsProject.instance()
manager = project.layoutManager()
layout = QgsPrintLayout(project)
layoutName = "PrintLayout"
layout.initializeDefaults()             #initializes default settings for blank print layout canvas
layout.setname(layoutName)
manager.addLayout(layout)
Let’s discuss what I just did. I created a project, which is a reference to the current Qgs project we are working in. The manager object holds the layout manager (layoutManager) for the current project. I create a layout and initalize the default settings (size, layout, etc) for the print layout.
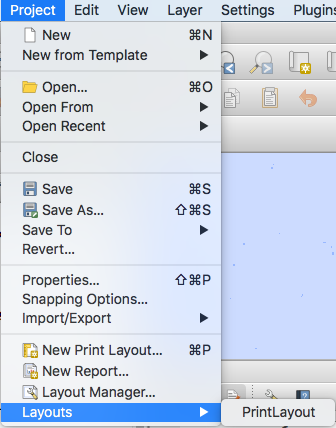
If you run the above code, look under “Project” > “Print Layouts” and you’ll see a new print layout, which is currently empty.
Before I move on, the above code works, but only ONCE. See again that I created a print layout object with a name: layoutName. If I run this code again, I’ll get an error message. One workaround is to rename the print layout (“PrintLayout2” for example) but I find this annoying. Also, in testing you’ll probably run this code many times, creating an ever growing list of test print layouts which you have to clean up later. So let’s fix this:
layouts_list = manager.printLayouts()
for layout in layouts_list:
    if layout.name() == layoutName:
        manager.removeLayout(layout)
This quick fix takes a look at the print layouts in the manager object, and stores it in layouts_list. Then I loop through each layout and if the layoutName == the name of an existing layout, remove it. Now I can create a new print layout, effectively overwriting what I had.
Now the fun begins. We need to add stuff to the print layout. Common things people add to the print layout include a map, legend, labels, scale bar, north arrow, etc. I am just going to address the map, legend, and labels in this example. Here is a reference to the documentation for the QgsLayoutItem class. You’ll see this class is a constructor for all the QgsLayoutItems of which there are many. Here is the inheritance diagram:
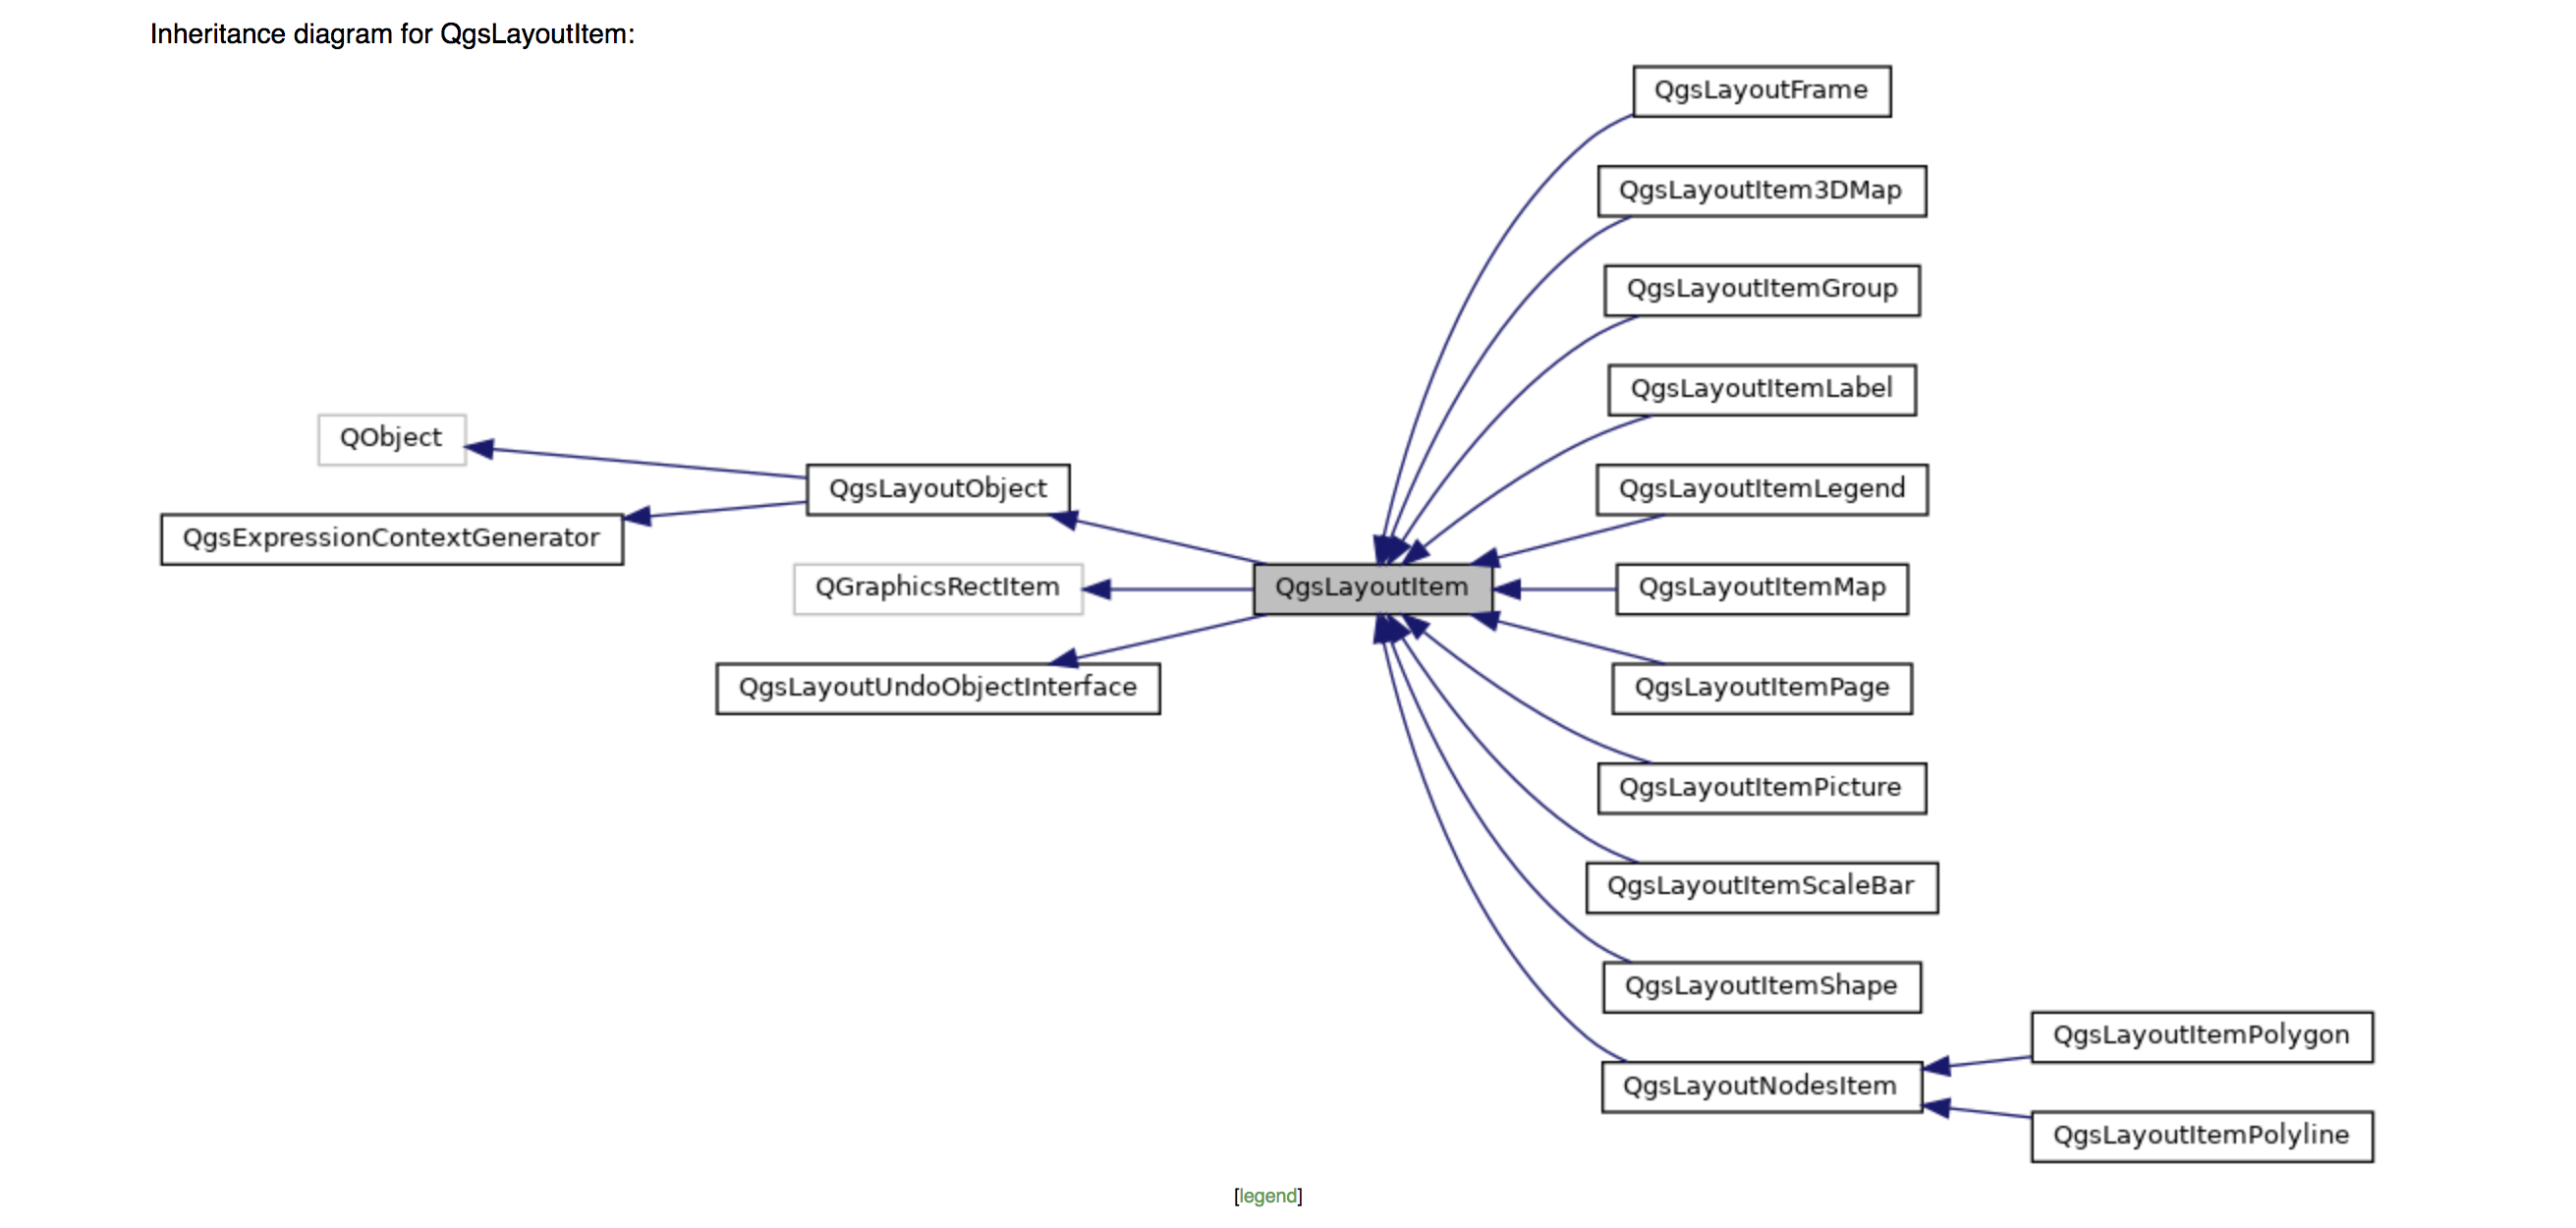
Each item has its own attributes, methods, etc. that were difficult to navigate (for me at least). Let’s start by adding a map object to the print layout. See the following code:
map = QgsLayoutItemMap(layout)
map.setRect(20, 20, 20, 20)                                     #I have no idea what this does, but it is necessary
#Set Map Extent
rectangle = QgsRectangle(1355502, -46398, 1734534, 137094)      #defines map extent using map coordinates
map.setExtent(rectangle)
layout.addLayoutItem(map)
#Move & Resize map on print layout canvas
map.attemptMove(QgsLayoutPoint(5, 27, QgsUnitTypes.LayoutMillimeters))
map.attemptResize(QgsLayoutSize(239, 178, QgsUnitTypes.LayoutMillimeters))
So in the previous code I created a map, which is a QgsLayoutItemMap object. My apologies but the map.setRect() method confuses me and to be honest, I can’t explain what it does or why its there. But it is necessary for the map to exist. The arguments (20, 20, 20, 20) seem to have no effect on the map but without calling this method, you’ll get an error. Next, I set the extent of the map. I have created a QgsRectangle object and manually defined the extent using map coordinates from my project. You can alternately define the extent using the following, which sets the extent to that of the interface’s map canvas, allowing you to change it dyamically.
canvas = iface.mapCanvas()
map.setExtent(canvas.extent())
layout.addLayoutItem(map)
Lastly, I move and resize the map object. Both methods’ arguments are pretty self explanatory. I move and resize the map object in millimeters. You can choose to work in inches or other units if you desire doing something like:
map.attemptMove(QgsLayoutPoints(1, 2, QgsUnitTypes.LayoutInches))
map.attemptResize(QgsLayoutSize(239, 178, QgsUnitTypes.LayoutMillimeters))
Now I’ve got a nice looking map which is framed and located where I want in the print layout. Mine looks like this:

Let’s move on to a layout item. As with the map, creating my layout was pretty tricky. The basic code to do a generic layout looks like this:
legend = QgsLayoutItemLegend(layout)
legend.setTitle("Legend")
layout.addLayoutItem(legend)
legend.attemptMove(QgsLayoutPoint(246, 5, QgsUnitTypes.LayoutMillimeters))
As with a map item, you must first create a QgsLayoutItem and specify your print layout to apply it to. In this case, our item is a legend so we use QgsLayoutItemLegend(). I added a title, which is optional. Then added the legend item to the print layout. Lastly, I moved the legend to where I want it to be on the map. This adds a legend with all layers in the map, including those that are turned off, additional tables, etc. Depending on your QGIS project, you might get a result like the following:
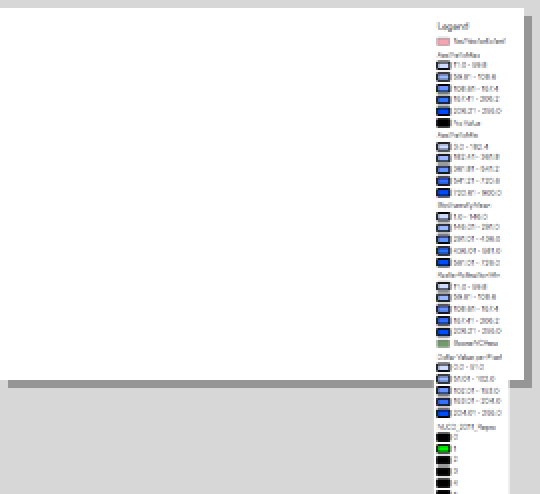
As you can see, the legend spills off the screen. In my QGIS project, I have a bunch of layers. Most of them are inactive and don’t need to be in the legend. I really just want a few things. So I modified my script to just include the active layers in my project. Let’s back up a bit (before I created the legend object).
#Checks layer tree objects and stores them in a list. This includes csv tables
checked_layers = [layer.name() for layer in QgsProject().instance().layerTreeRoot().children() if layer.isVisible()]
print(f"Adding {checked_layers} to legend." )
#get map layer objects of checked layers by matching their names and store those in a list
layersToAdd = [layer for layer in QgsProject().instance().mapLayers().values() if layer.name() in checked_layers]
In the above code snippet, I make a list called checked_layers. In checked_layers I check the QgsProject().instance() which is the current QGIS project I’m working in. Then look at the layerTreeRoot(), which holds all the layers in the project. Lastly, .children() are the actual layers themselves in the layerTreeRoot(). I added a print statement to print which layers I am adding, which will print in the console.
Now I make a new object, layersToAdd. In this object I look at the QgsProject().instance().mapLayers() which are all layers in the QgsProject instance. Then I add the .mapLayers().values() (values from all the map layers) if those objects are in checked_layers. I think this could have been shortcut, but now I have a list of all active map layers, stored in layersToAdd.
Now, we can go back create the legend object. We want to add only the active layers to the legend, so let’s do it this way:
legend = QgsLayoutItemLegend(layout)
legend.setTitle("Legend")
root = QgsLayerTree()
for layer in layersToAdd:
    #add layer objects to the layer tree
    root.addLayer(layer)
legend.model().setRootGroup(root)
layout.addLayoutItem(legend)
legend.attemptMove(QgsLayoutPoint(246, 5, QgsUnitTypes.LayoutMillimeters))
All lines are the same, except I create a root object (which is a QgsLayerTree, holding the layers) and loop through the layersToAdd, adding them to the root object. Lastly, I .setRootGroup on the legend, which resets the legend model and uses a new one.
So lets take a look at what the legend looks like now, I just turned on one layer in my example. But you can see, now only the active layers are added to the legend. This is really nice!

Lastly, I’m going to add some label items to my map. I found these easier to work with, but still have their own quirks. Common things people add to maps include a title and subtitle, so let’s add those:
"""This adds labels to the map"""
title = QgsLayoutItemLabel(layout)
title.setText("Title Here")
title.setFont(QFont("Arial", 28))
title.adjustSizeToText()
layout.addLayoutItem(title)
title.attemptMove(QgsLayoutPoint(10, 4, QgsUnitTypes.LayoutMillimeters))

subtitle = QgsLayoutItemLabel(layout)
subtitle.setText("Subtitle Here")
subtitle.setFont(QFont("Arial", 17))
subtitle.adjustSizeToText()
layout.addLayoutItem(subtitle)
subtitle.attemptMove(QgsLayoutPoint(11, 20, QgsUnitTypes.LayoutMillimeters))   #allows moving text box
First, notice we are now using QgsLayoutItemLabel. Each QgsLayoutItem has its own class as seen earlier in the inheritance diagram from documentation. We use pretty obvious methods like .setText to define what the label item says and .attemptMove to locate the label on the print layout. I set the font with .setFont, choosing the font style and size. The wierd one here is .adjustSizeToText(). Basically you have to define the size of the layout item. This .adjustSizeToText does exactly what it says, setting the size to the corresponding text. I can’t think of a scenario why you would make the label object any other size, but I am sure one exists.
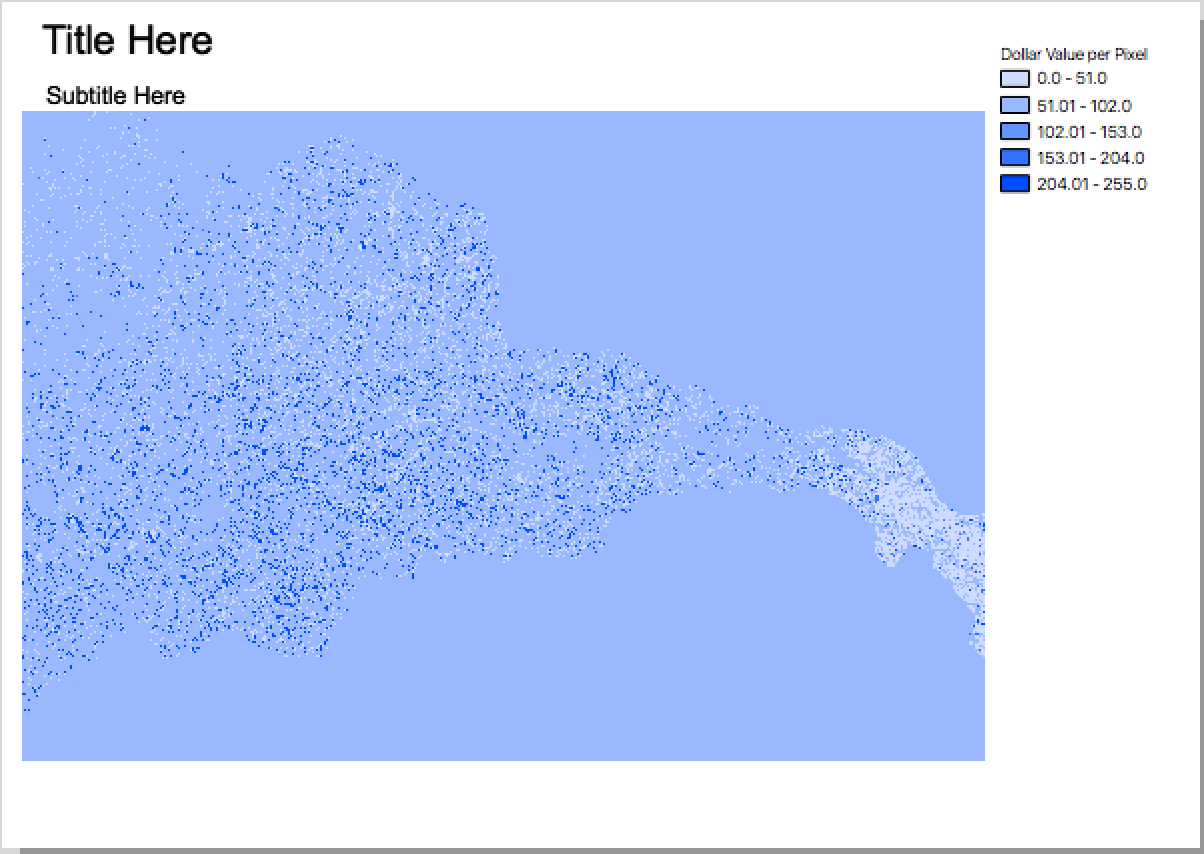
Let’s take a look at our print layout. Things have come together nicely. Mine looks like this:
Our last step is to export the print layout as either a .pdf or image file that you can share with others. I found this to be the easiest part of the process. Thankfully at least one piece was easy!
"""This exports a Print Layout as an image"""
layout = manager.layoutByName(layoutName)         #this accesses a specific layout, by name (which is a string)

exporter = QgsLayoutExporter(layout)                #this creates a QgsLayoutExporter object
exporter.exportToPdf('/Users/ep9k/Desktop/TestLayout.pdf', QgsLayoutExporter.PdfExportSettings())      #this exports a pdf of the layout object
#exporter.exportToImage('/Users/ep9k/Desktop/TestLayout.png', QgsLayoutExporter.ImageExportSettings())  #this exports an image of the layout object
I gave an example of how to export to .pdf and an image file (.png). I provided the path to my desktop where I saved the object.
There you have it. A step-by-step walkthrough of how to create a print layout and export the final map. As I stated in the beginning, this was far more involved than I expected so hopefully it can help make your life easier.