How To Manually Install Qgis Plugins
I recently took up a side project working with a colleague to add some functionality to an existing QGIS plugin. This led me down a road of exploration, frustration, hand wringing, and ultimately learning. First, I’ll quickly address what a plugin is. Basically a plugin is a bit of extra functionality, probably written by a third party, which you can download and use in QGIS. The official list of qgis plugins are availabe here.
Part of the fun of an open source project like QGIS is that you can write your own plugins. If you create a plugin that serves a purpose not covered by other QGIS tools (or other QGIS plugins), you can make it publicly available via the official repository. I won’t go into plugin creation much here, that is a potential topic for a future blog post. Today we are talking about how to install a plugin manually on your local machine. Why would you do this? I can think of 2 good reasons but I am sure there are more. First, if you have created a plugin that you want to use personally or within your organization but don’t want to share it publicly. Second, if you are developing a plugin or adding to an existing plugin, you can create your own development version before rolling it out for everyone.
So let’s get to it. How does one install a QGIS plugin locally and manually? I figured I’d need to learn about QGIS plugins in general in order to do my project, so I started with my go-to resource, The PyQGIS Programmer’s Guide: Extending QGIS 3 with PyQGIS by Gary Sherman, the original founder of QGIS. The book has a full chapter dedicated to writing plugins as well as parts of other chapters dedicated to various aspects of plugin architecture, etc. If you don’t have the book, Gary Johnson himself has created the “Plugin Builder”, which is a plugin itself, to create plugins. You add some metadata and the Plugin Builder and voila! You have a QGIS plugin. Most of the pieces are there but I encountered some issues actually implementing this so I wanted to share my experience as well as some pitfalls you may want to look out for.
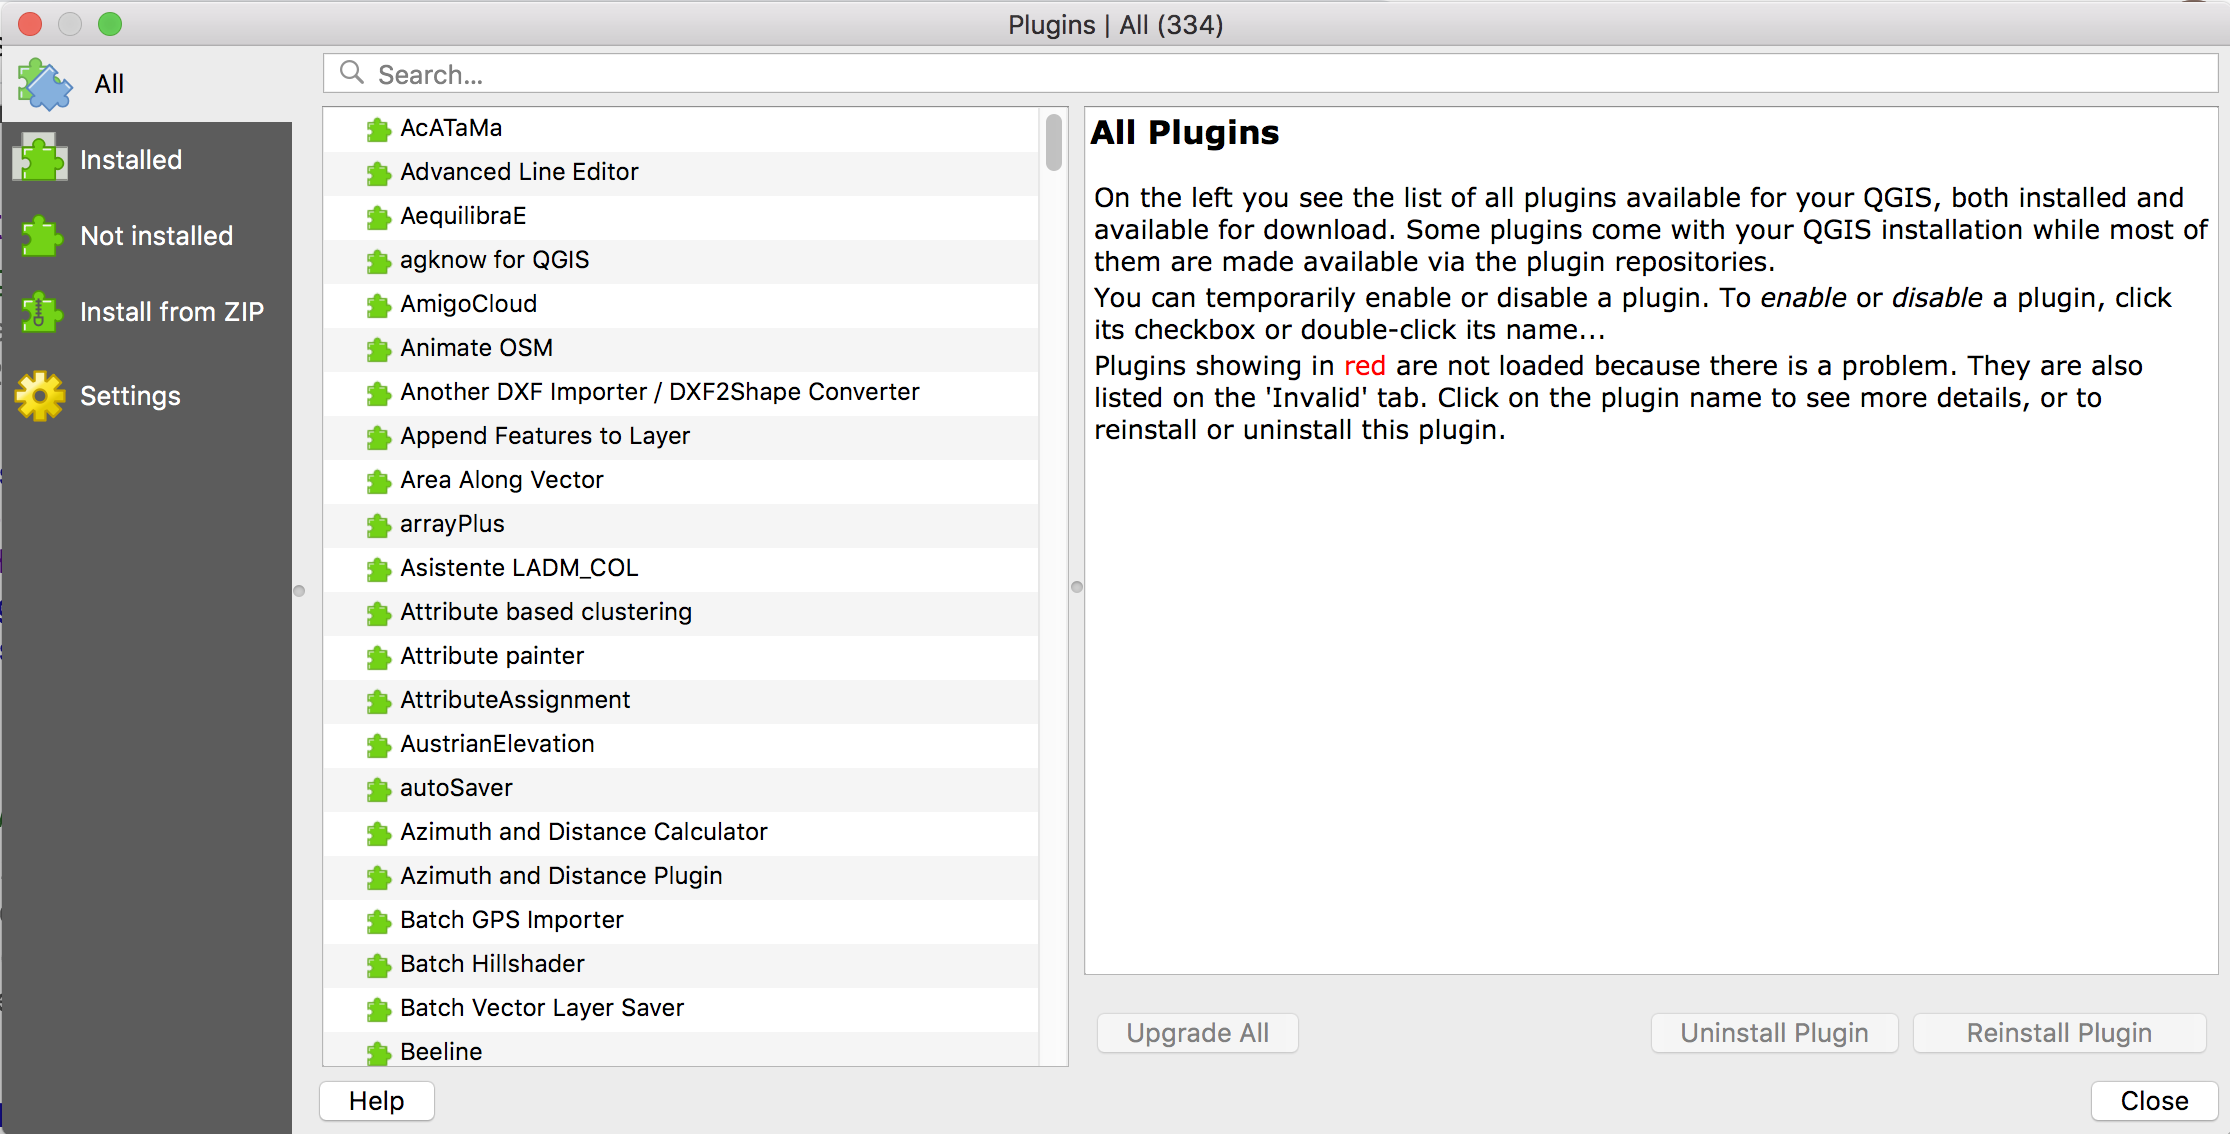
First, plugins are managed, installed, uninstalled, etc. via the Plugin Manager, which looks like this.
When you go through the Plugin Builder steps, at the end you’ll get a couple important pieces of information to help guide you further.
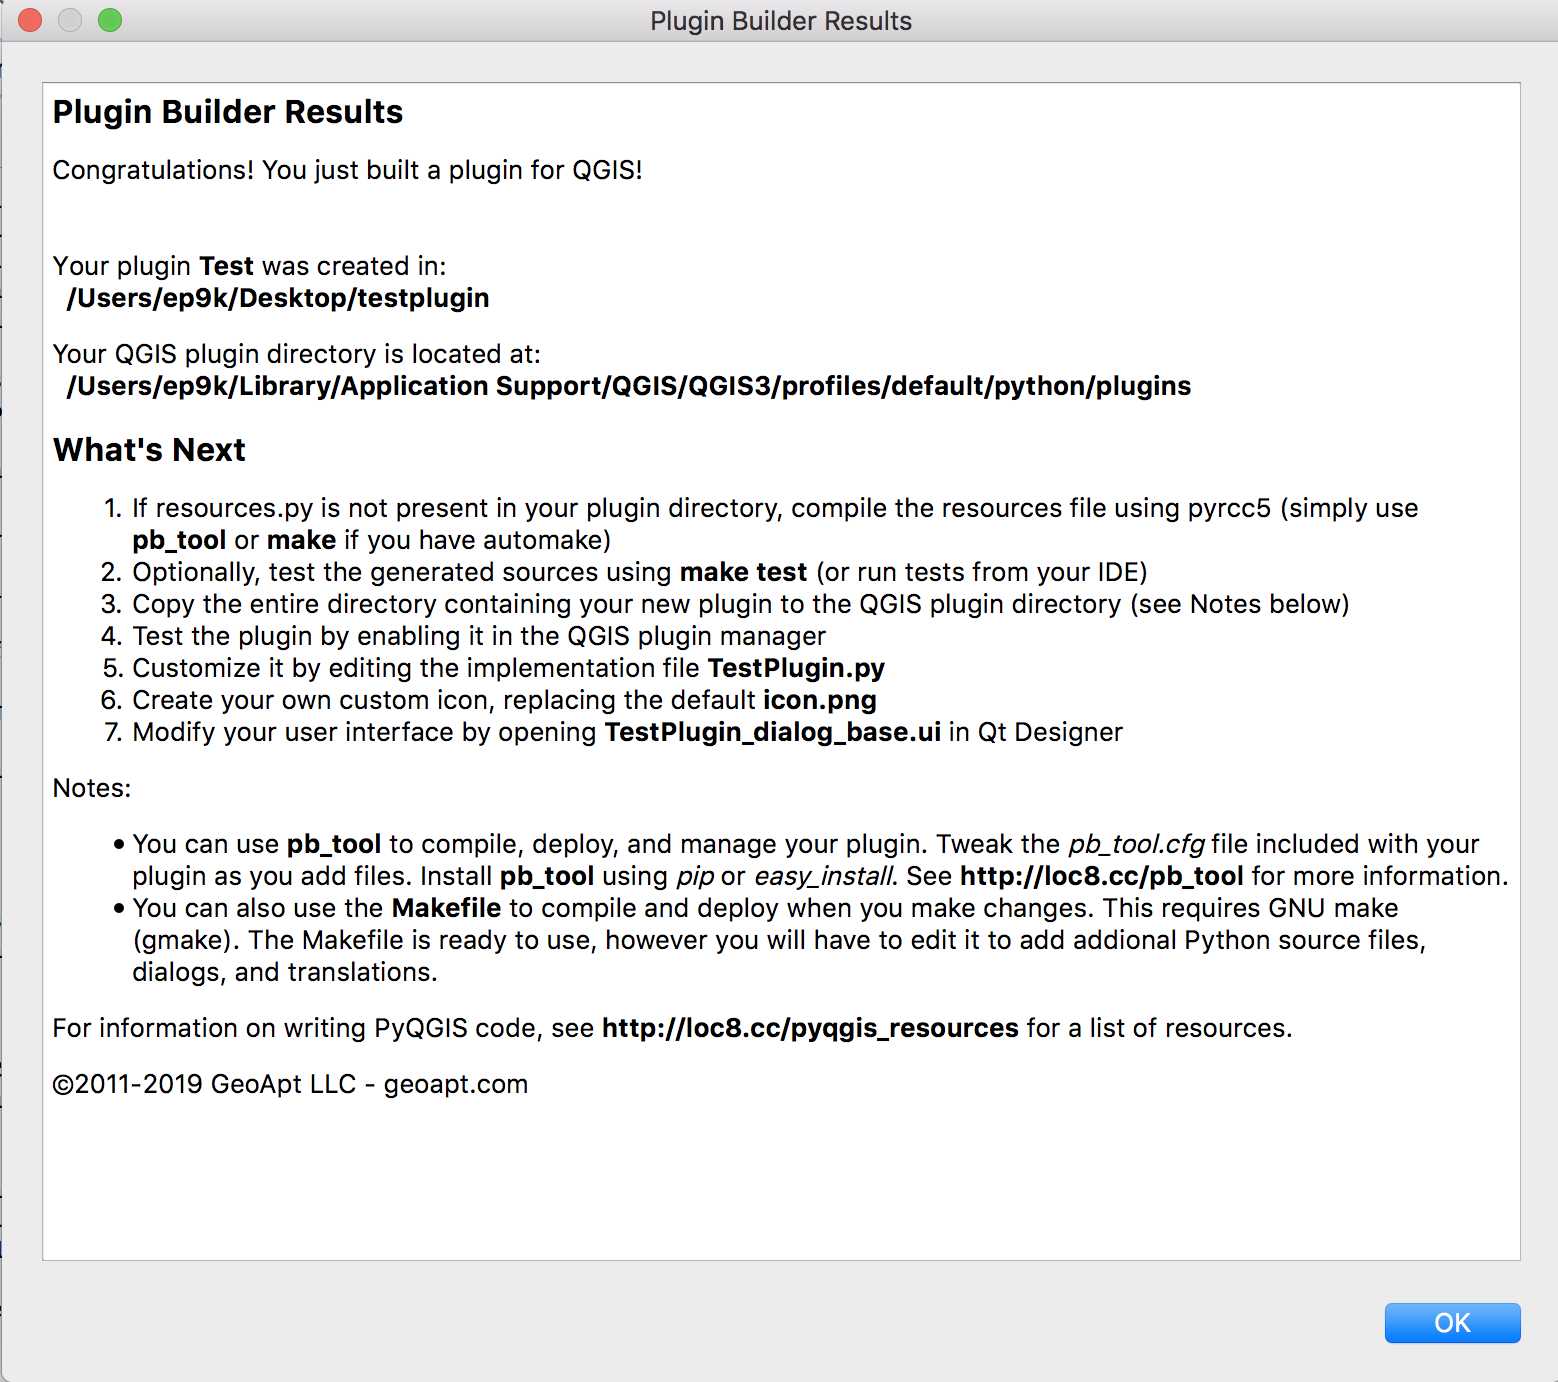
This first message gives you some ince information such as where your plugin’s directory is located, how to customize your plugin, how to change the interface, etc.
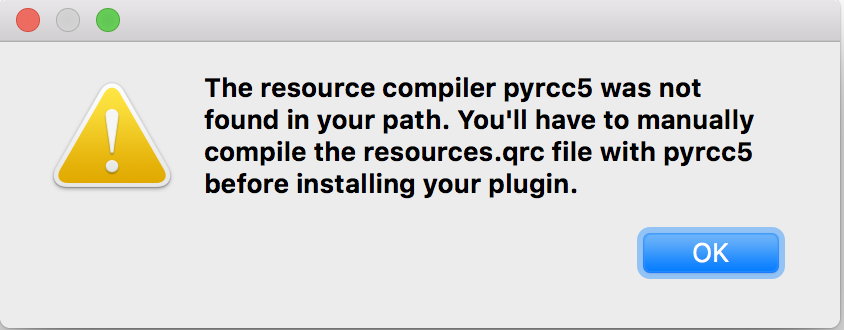
As the warning message says (2nd image), you must manually compile the resources.qrc file in your plugin directory before installing your plugin. But before we do this, let’s edit our metadata.txt file. This provides important metadata which the plugin checks to make sure parameters are in order. Navigate to your plugin’s directory and open the metadata.txt file. It should look something like this:
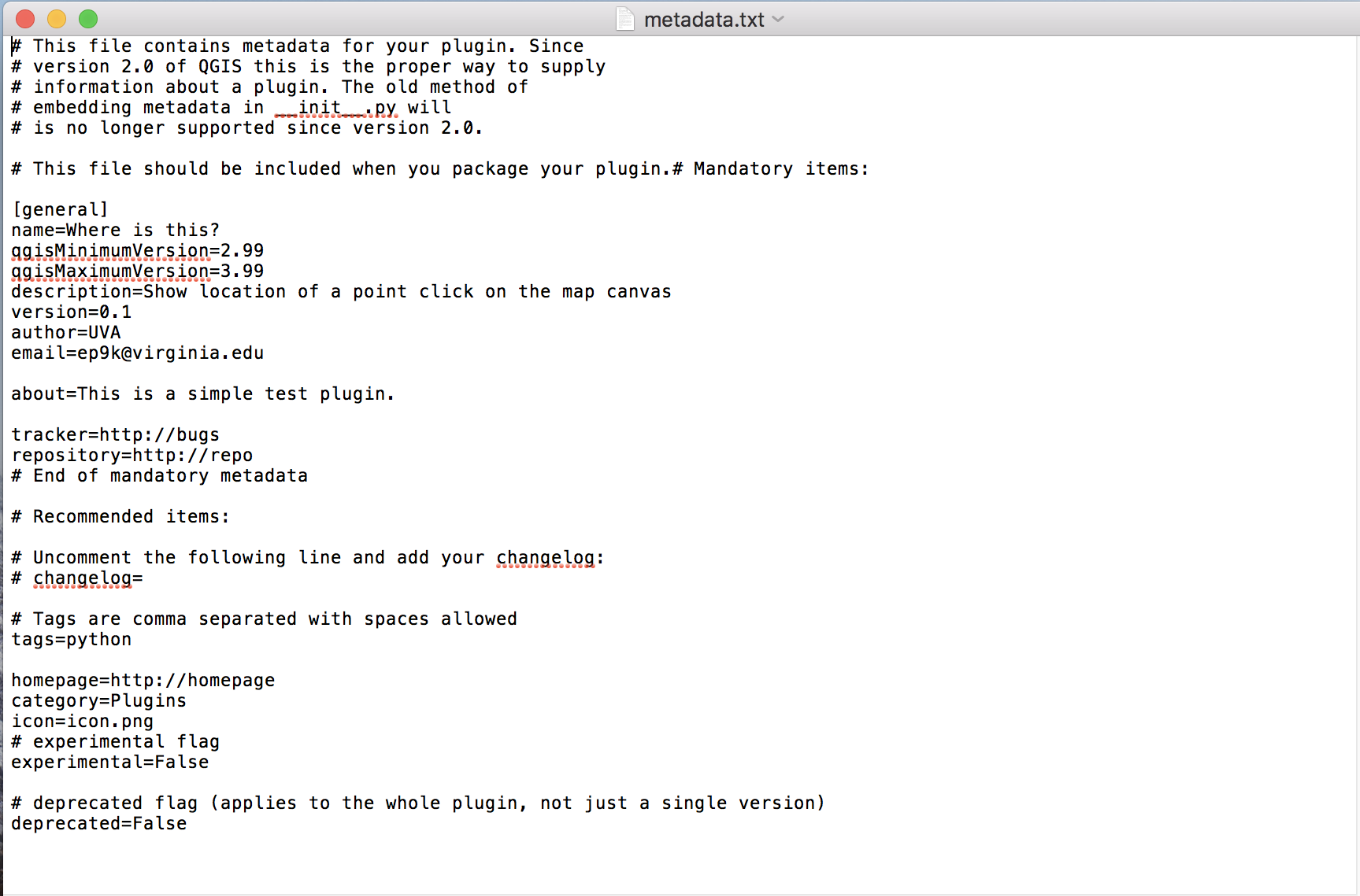
Specifically, you want to look for the qgisMinimumVersion (and qgisMaximumVersion). The qgisMinimumVersion should be lesser than the version are using. If you are using QGIS 3.X, your qgisMinimumVersion could look like mine (with a value of 2.99). I have also commonly seen qgisMinimumVersion = 3.0. The qgisMaximum version is optional, but you can include one and if you do make sure your min version and max version parameters cover the version you are actually using and creating this plugin for.
Ok, back to resources.qrc… Both the book and QGIS documentation ask you to open the terminal (Mac) or shell (Windows), navigate to where your new plugin folder has been created by the Plugin Builder, and run the following command:
pyrcc5 -o resources_rc.py resources.qrc
I honestly don’t know why, but I do know this DOES NOT WORK. What you really should run is:
pyrcc5 -o resources.py resources.qrc
Obviously, QGIS reads the plugins folder and looks for resources.py to read from. Not resources_rc.py. You might also look at this command and wonder, what is this pyrcc5 business? Here is the pyrcc5 documentation, but in short, this reads resources.qrc and generates a python module that only needs to be imported by the application.
Now you need to copy your new plugin directory to the “plugins” folder that QGIS loads plugins from. Where do we find this? By default, your path will be something like this (for a Mac): /Users/ep9k/Library/Application Support/QGIS/QGIS3/profiles/default/python/plugins/test
However, if you try to navigate to this folder graphically via the ‘Finder’ (Mac) or ‘Browser’ (PC), you will find that it is hidden. Now, if you are savvy using the terminal (Mac) or Shell (PC), notice that you CAN navigate to this directory. You could change permissions to make this visible if you want. Another easy way to find it is via QGIS. See the following:
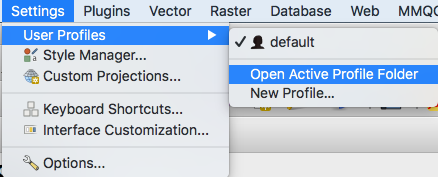
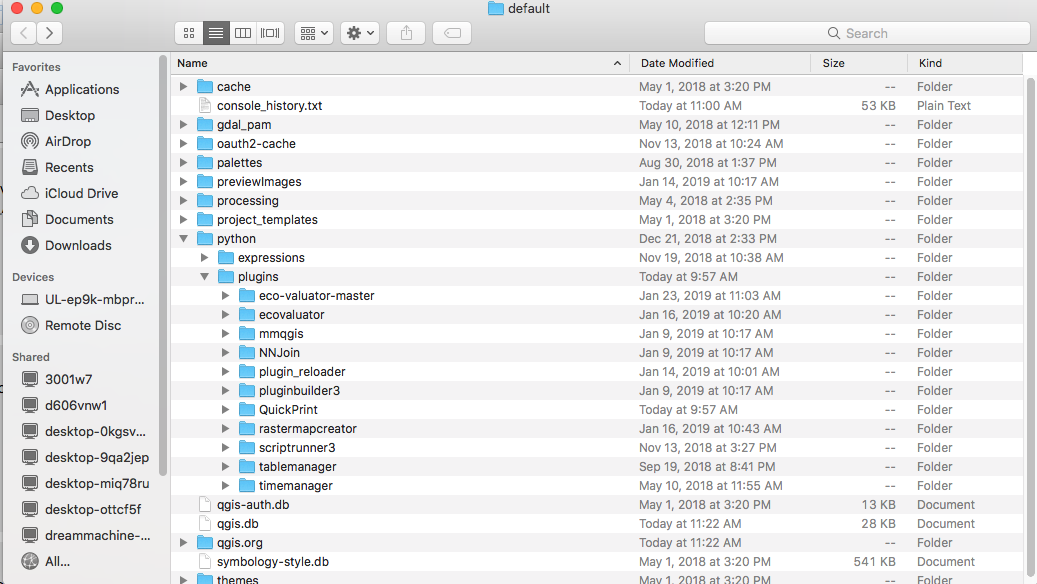
and this button opens your plugins folder for you. It should look like this. These are all the plugins I have installed. Yours will probably have some different folder names:
So now lets copy our new plugin’s folder to the directory which holds the other QGIS plugins. You can drag and drop via the GUI ‘finder’ (or window’s equivalent) now that you know how to navigate to this hidden directory via QGIS. Or you can use the terminal to copy your directory via a command like the following:
cp -r /Users/ep9k/Desktop/testplugin /Users/ep9k/Library/Application\ Support/QGIS/QGIS3/profiles/default/python/plugins
This is a little tricky, notice the ‘Application Support’ folder has a space in it so you have to account for that by adding a ‘backslash’ character (as in Application\ Support).
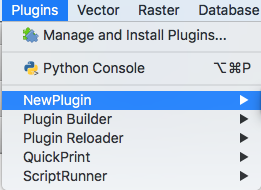
Check your QGIS plugins directory again to make sure your new plugin folder now exists there. You’ll now have to re-start QGIS as it reads from the folder upon startup. After re-starting, navigate to your Plugin Manager, then ‘Manage and Install Plugins’. Check the ‘Installed’ tab and you should see your plugin. The last thing you need to do is check the box to activate the plugin. See below (mine is called ‘newplugin’):

Your plugin will now be available in the “plugins” tab either at the top of the screen or the “plugins” toolbar if you choose “View” > “Toolbars” > “Plugins Toolbar”.
You have not yet added any functionality to the plugin. If you open it, you have a blank dialog box. But you do at least have the plugin infrastructure.
Congratulations! You’ve manually installed a QGIS plugin.